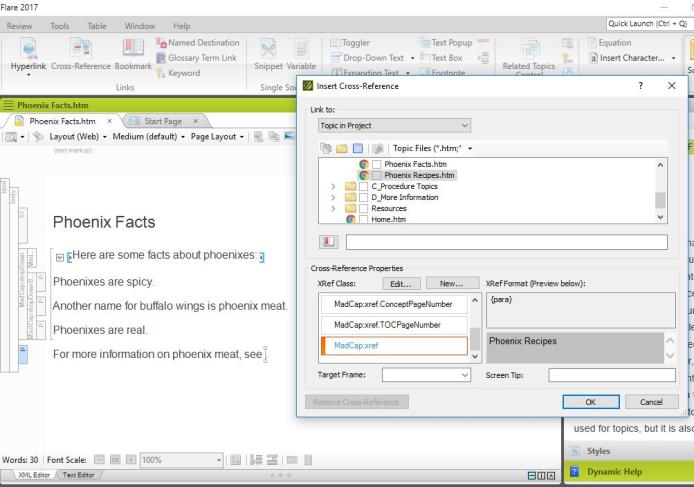
Adding a Cross-Reference to Another Topic
Cross-references are a useful and quick way to link from one topic to another. In online outputs they appear as hyperlinks, while in print text they refer the user to another page number. You can either insert a cross-reference manually from the Insert ribbon, or you can create one by dragging the topic to which you want to link from the Content Explorer into the XML Editor.
- Place the cursor where you want the first letter of the cross-reference to appear.
- Select the Insert tab to open the Insert ribbon.
- Click the Cross-Reference icon in the Links section of the Insert Ribbon. The Insert Cross-Reference window appears.
- Select Topic in Project in the drop-down menu under “Link to.”
- Select the project to which you want to link in the file browser.
- Select MadCap:xref under XRef Class.
- Click OK. The cross-reference appears in the topic.
- Place the cursor where you want the first letter of the cross-reference to appear.
- Locate the topic to which you want to link in the Content Explorer.
- Drag the topic from the Content Organizer to the location of the cursor in the XML Editor. The cross-reference appears in the topic.


