Adding an Image to a Topic
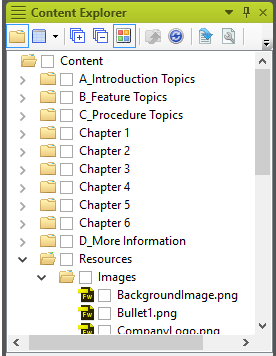
MadCap Flare allows you to insert Images directly into a project’s content, or topics. This is done either by uploading external images saved on your device, or using any of the limited images contained within a Flare project’s template. Images are saved by default to the Images folder, found in the Resources folder of the Content Explorer.
- Right-click the Images folder in the Resources folder in the Content Explorer. A context menu appears.
- Hover over New. Another context menu appears.
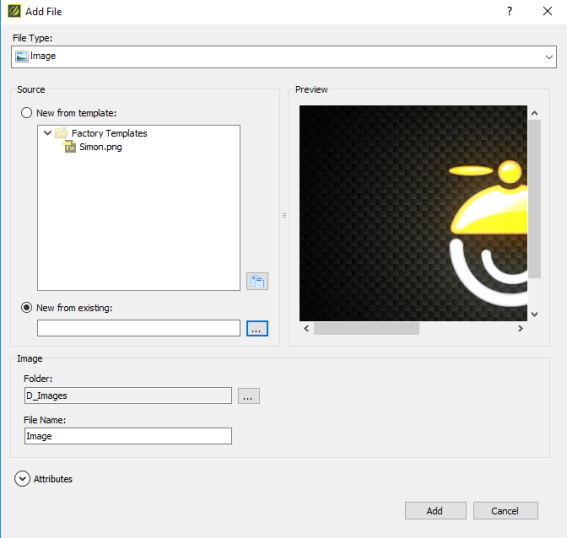
- Select Image. The Add File window appears.
- Select the radio button next to “New from existing."
- Click the ellipses next to “New from existing.” The Open File window appears and displays the files available on your device.
- Select the image you want to import to the project.
- Click Open.
- Click Add. The image is added to the Images folder.
- Open the topic into which you want to insert an image. Topics are located in the Content Explorer.
- Place the cursor where you want to insert the image in the topic.
- Select the Insert tab to open the Insert ribbon.
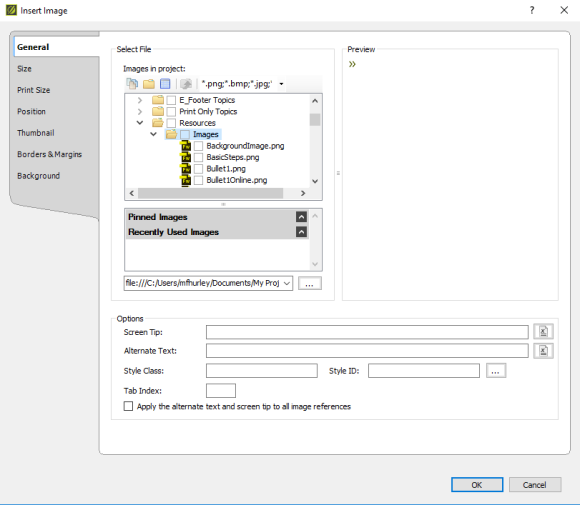
- Click Image in the Multimedia section of the Insert ribbon. The Insert Image window appears.
- Select the image you want to insert in the “Select File” section. If you saved the image to the default folder, as shown in "Importing an Image," it is in the Images folder in the Resources folder in the Content Explorer.
- Select the image.
- Click OK. The image appears in the topic at the location of the cursor.
- Open the topic into which you want to insert an image. Topics are located in the Content Explorer.
- Place the cursor where you want to insert the image in the topic.
- Select the image from the Images folder in the Resources folder in the Content Explorer.
- Drag the image into the topic.


